
Things you’'ll need:


For perspective and size. Those are quart paint cans of latex primer.
https://growershouse.com/cloning-mediums/neoprene-inserts-2?aff=2
4 inch stone:
One of these one outlet air pumps:
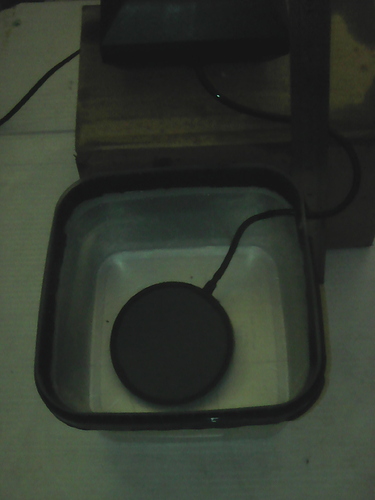
And first a preview of a small single collar cloner.


You can use again one of the single outlet air-pumps listed above and the same collars and net pots.


I like the folgers containers because they won’t need any light proofing if used under seedling/clones intensity light. For more intense light, you’d probably want to light proof them, even the black lid is a little thin and can let intense light through.
And now back to the more “deluxe” 9 capacity/site bubble cloner.
The steps to make the single collar/netpot cloner is easier than the 9 spot one, but many of the detailed steps are the same as follows.


There are a couple ways you can go about light proofing this clear container with a thin very translucent lid.
You could cover the entire outside of the container with a dollar roll of aluminum tape.
You could paint the outside with black latex primer and then a white coat of primer. I like to start with the white killz primer, as it is super sticky, a great primer, and it is mold inhibiting. Then a black primer latex coating for light proofing, and then one last final killz white outer coat to protect the black latex coat and for helping the container avoid absorbing heat from the lights.
I am going to do a bit of both, aluminum tape and latex paint. The aluminum tape is probably the least expensive if you are on a budget, then you’d want to use a really thick black plastic bag or panda film for a “hooded” lid cover.
In case anyone is wondering about the plastic’s safety, it is one of the safest recommended plastics.

Of course I cleaned the container before deciding to use this container, and of course don’t use containers that are storing things that aren’t “food safe” even if the plastic is food safe. These dishwasher pods might not be safe to eat or swallow, but they are safe to wash your dishes with and the container shouldn’t have any unsafe residue.

You’ll notice the “overhang” and tab on this container, those grooves will need special attention to make sure they are light proofed. Also, the tab I will cut off and use the “cutout” area to drill my air-hose’s hole.


You should be able to use a regular “bic” type ballpoint pen to mark on the black plastic, with a hard smooth surface underneath the plastic sheet, and still be able to see the ink enough to cut your circles out of the sheet.

Mark the sheet with arrows so you know best which way the “hood” or “skirt” will line up best with the holes in the lid.

Start covering the container with aluminum tape


I decided to cover the aluminum tape with white duct tape for protection. You could use the gray duct tape as well.


I only put the aluminum tape to the “overhang”. I will fill all the niches in with the latex black primer for light proofing.


Let it dry. And now you can put the lid and skirt on, and populate the holes with net pot collars and foam collar inserts.


You could just use a rubber band or string to tie the skirt down over the container.

I folded the sides down but with loose room around the container. I folded kind of like wrapping a present and stapled the corners.


And then I trimmed off the excess plastic.

Time to drill the hole. make sure it fits the aquarium poly air hose.


Be careful to put the hole low enough the lid and the clone collars don’t get in the way, but above the water line.


Notice the black appears through the clear plastic and creates the “max fill water line”.


A pic of the folgers cloner and its big brother.

Happy cloning,
MacG
 Right up.your alley